
Published in 2021. Last updated in 2026.
This tutorial shows how you build and submit your progressive web application (PWA) to the Google Play Store. We use the PWA from our Modern Web App tutorial series as an example and wrap it as a Trusted Web Activity (TWA) using the Bubblewrap CLI by Google Chrome Labs. You can find more details about Bubblewrap in their GitHub repository.
Every PWA submitted to Google Play Store must pass their review process before it is published in the store.
 PREREQUISITES
Google accounts
-
Sign up for, or log in to, a Google account.
-
Sign up for a Google Play Developer account.
There is a one-time $25 sign-up fee for a Google Developer account.
Graphics
Before you start, make sure you have your assets ready. You’ll need a high-res icon and a featured graphic to get through the Play Store upload process. For a complete breakdown of size requirements and design tips, it’s worth a quick look at the official Play Console documentation.
- High-resolution icon
32-bit PNG (with alpha)
Dimensions: 512px x 512px
Maximum file size: 1024KB
- Featured graphic
JPEG or 24-bit PNG (no alpha)
Dimensions: 1024px x 500px
You can find a full list of requirements, recommendations and guidelines in the Play Console Help documentation.
PWA
NOTE: Skip this step if you already have a PWA that you can use.
We’ll be using the Bubblewrap CLI to wrap a PWA for deployment to the Google Play Store.
If you don’t have a PWA, we recommend using the PWA created in our comprehensive tutorial series for modern web application development. You can try the finished application here and download the PWA here.
Alternatively, follow one of our framework-independent basic tutorials to turn your web app into a PWA.
Tools and software
You need the following software before creating a TWA from your PWA. Install the following tools and make a note of their installation paths for the next step
- Node.js (version 10 or higher).
In older versions, JDK 8 and AndroidSDK need to be installed. The JDK Version has been updated to 17 and both libraries have been integrated into the bubblewrap installations process.
Install the Bubblewrap CLI
After your have installed Node, JDK 8 and Android SDK, run the npm i -g @bubblewrap/cli command in your terminal to download and install the Bubblewrap CLI:
```shel
npm install -g @bubblewrap/cli
npm warn deprecated @types/gapi.client.androidpublisher@3.0.2: use @types/gapi.client.androidpublisher-v3 instead; see https://github.com/Maxim-Mazurok/google-api-typings-generator/issues/652 for details
npm warn deprecated phin@3.7.1: Package no longer supported. Contact Support at https://www.npmjs.com/support for more info.
npm warn deprecated google-p12-pem@3.1.4: Package is no longer maintained
npm warn deprecated tar@6.2.1: Old versions of tar are not supported, and contain widely publicized security vulnerabilities, which have been fixed in the current version. Please update. Support for old versions may be purchased (at exorbitant rates) by contacting i@izs.me
npm warn deprecated uuid@8.3.2: uuid@10 and below is no longer supported. For ESM codebases, update to uuid@latest. For CommonJS codebases, use uuid@11 (but be aware this version will likely be deprecated in 2028).

added 288 packages in 15s

40 packages are looking for funding
 run `npm fund` for details
```
Bubblewrap now handles JDK 17 and Android SDK setup automatically — during bubblewrap init, it offers to download and install both into a dedicated folder (~/.bubblewrap), so you no longer need to install them manually on your host system beforehand.
```shell
bubblewrap init ...
,-----. ,--. ,--. ,--.
| |) /_,--.,--| |-.| |-.| |,---.,--. ,--,--.--.,--,--.,---.
| .-. | || | .-. | .-. | | .-. | |.'.| | .--' ,-. | .-. |
| '--' ' '' | `-' | `-' | \ --| .'. | | \ '-' | '-' '
`------' `----' `---' `---'`--'`----'--' '--`--' `--`--| |-'
 `--'

? Do you want Bubblewrap to install the JDK (recommended)?
 (Enter "No" to use your own JDK 17 installation) Yes
Downloading JDK 17 to /Users/sebastian/.bubblewrap/jdk
Downloading the JDK 17 Sources...
 >> [████████████████████████████████████████] 100% | 174793k of 174793k

Decompressing the JDK 17 Sources...
Downloading the JDK 17 Binaries...
 >> [████████████████████████████████████████] 100% | 174187k of 174187k

Decompressing the JDK 17 Binaries...
Extracting /Users/sebastian/.bubblewrap/jdk/OpenJDK17U-jdk_aarch64_mac_hotspot_17.0.11_9.tar.gz to /Users/sebastian/.bubblewrap/jdk
? Do you want Bubblewrap to install the Android SDK (recommended)?
 (Enter "No" to use your own Android SDK installation) Yes
? Do you agree to the Android SDK terms and conditions at https://developer.android.com/studio/terms.html? Yes
Downloading Android SDK to /Users/sebastian/.bubblewrap/android_sdk
Downloading the Android SDK...
 >> [████████████████████████████████████████] 100% | 84504k of 76752k
Decompressing the Android SDK...
Convert your PWA to a TWA
Initialize Bubblewrap by running the bubblewrap init --manifest=https://COMPLETE URL/manifest.json command. Replace ‘COMPLETE_URL’ with the URL link of your PWA. This example runs the example app on a local HTTP server:
NOTE: You can serve the vaadin app locally using the ./mvnw spring-boot:run command.
```shell
bubblewrap init --manifest=http://localhost:8080/manifest.webmanifest
,-----. ,--. ,--. ,--.
| |) /_,--.,--| |-.| |-.| |,---.,--. ,--,--.--.,--,--.,---.
| .-. | || | .-. | .-. | | .-. | |.'.| | .--' ,-. | .-. |
| '--' ' '' | `-' | `-' | \ --| .'. | | \ '-' | '-' '
`------' `----' `---' `---'`--'`----'--' '--`--' `--`--| |-'
 `--'
Initializing application from Web Manifest:
 - http://localhost:8080/manifest.webmanifest
WARNING: Trusted Web Activities are currently incompatible with applications
targeting children under the age of 13. Check out the Play for Families
policies to learn more.
```
Bubblewrap will try to pull details directly from your manifest.webmanifest file, but feel free to tweak these settings manually if you need to.
TIP: You can skip the optional details by pressing the Enter key.
```shell
Web app details (1/5)

The application generated by Bubblewrap will open a Progressive Web App when
started from the Android launcher. Please enter the following details about
the PWA:

 - Domain: the domain / origin where the PWA is hosted.
  Example: example.com

 - URL path: an URL path relative to the root of the origin,
  opened when the application is started from the home screen.
  Examples:
  - To open https://example.com/: /
  - To open https://example.com/path-to-pwa/: /path-to-pwa/

? Domain: .
? URL path: /

Android app details (2/5)

Please, enter details regarding how the Android app will look when installed
into a device:

 - Application name: the name used in most places,
  including the App information screen and on the Play Store.

 - Short name: an alternate name for the app, limited to
  12 characters, used on a device launch screen.

 - Application ID: also known as Package Name, this is
  the unique identifier for the application on an Android device or
  the Play Store. The name must contain at least two segments,
  separated by dots, each segment must start with a letter and all
  characters must be alphanumeric or an underscore (_).

 - Display mode: how the app will be displayed on the
  device screen when started. The default mode, used by most apps,
  is standalone. fullscreen causes the device status bar and
  navigation bars to be removed and is suitable for games or media
  players. For more information on the status bars and navigation
  bar on Android, go to:
  - https://material.io/design/platform-guidance/android-bars.html.

 - Status bar color: sets the status bar color used when the
  application is in foreground. Example: #7CC0FF

? Application name: Vaadin CRM
? Short name: CRM
? Application ID: localhost_8080.twa
? Starting version code for the new app version: 1
? Display mode: standalone
? Orientation: default
? Status bar color: #056ff0

Launcher icons and splash screen (3/5)

The Android app requires an image for the launcher icon. It also displays a
splash screen while the web content is loading, to avoid displaying a flash of
a blank white page to users.

 - Splash screen color: sets the background colour used for the
  splash screen. Example: #7CC0FF

 - Icon URL: URL to an image that is at least 512x512px. Used to
  generate the launcher icon for the application and the image for
  the splash screen.

 - Maskable Icon URL (Optional): URL to an image that is at least
  512x512px to be used when generating maskable icons. Maskable
  icons should look good when their edges are removed by an icon
  mask. They will be used to display adaptive launcher icons on the
  Android home screen.

? Splash screen color: #D40CD4
? Icon URL: http://localhost:8080/icons/icon.png
? Maskable icon URL:

Optional Features (4/5)

 - Include app shortcuts: This question is only prompted if a
  'shortcuts' section is available on the input Web Manifest. When
  answered “yes”, Bubblewrap uses the information to generate
  shortcuts on the Android app. Read more about app shortcuts at
  https://web.dev/app-shortcuts/.

 - Monochrome icon URL: URL to an image that is at least 48x48px to
  be used when generating monochrome icons. Monochrome icons should
  look good when displayed with a single color, the PWA's
  theme_color. They will be used for notification icons.

? Monochrome icon URL:
? Include support for Play Billing? No
? Request geolocation permission? Yes
```
Tip: Requesting Geolocation Permission
Answering "Yes" to Request geolocation permission? grants your TWA access to the device's location. Handling this in Vaadin just got much easier: Vaadin 25.2 introduces a Java API for geolocation — Geolocation.getPosition(...) for one-shot reads and Geolocation.watchPosition(...) for continuous tracking as a signal, with sealed result types making permission-denied, unavailable, and timeout cases straightforward to handle. See the Geolocation API documentation for details.
Generate or locate signing keys
You need Android signing keys to deploy to the Play Store. Bubblewrap will use an existing key at ./android.keystore, if you already have a key. If you do not, you can generate keys in the terminal window:
```Shell
Signing key information (5/5)

Please, enter information about the key store containing the keys that will be used
to sign the application. If a key store does not exist on the provided path,
Bubblewrap will prompt for the creation of a new keystore.

 - Key store location: The location of the key store in the file
  system.

 - Key name: The alias used on the key.

Read more about Android signing keys at:
  https://developer.android.com/studio/publish/app-signing

? Key store location:
/Users/sebastian/Documents/Vaadin/Developer-Relations/submit-pwa-googlestore/flow-crm-tutorial/android.keystore
? Key name: android
Generating Android Project.
 >> [████████████████████████████████████████] 100%
```
Type Y to begin creating signing keys. Fill in the required details and enter separate passwords for the Key Store and the Key. Note the passwords for the next step.
```shell
Signing key creation

An existing key store could not be found at "/Users/sebastian/Documents/Vaadin/Developer-Relations/submit-pwa-googlestore/flow-crm-tutorial/android.keystore".

? Do you want to create one now? Yes
? First and Last names (eg: John Doe): Sebastian Kuehnau
? Organizational Unit (eg: Engineering Dept): Developer Relations
? Organization (eg: Company Name): Vaadin GmbH
? Country (2 letter code): DE
? Password for the Key Store: ********
? Password for the Key: ********
keytool Signing Key created successfully

Project generated successfully. Build it by running bubblewrap build
```
Build the APK
1. Run the bubblewrap build command to build an Android application package (APK) from the project.
```shell
bubblewrap build
,-----. ,--. ,--. ,--.
| |) /_,--.,--| |-.| |-.| |,---.,--. ,--,--.--.,--,--.,---.
| .-. | || | .-. | .-. | | .-. | |.'.| | .--' ,-. | .-. |
| '--' ' '' | `-' | `-' | \ --| .'. | | \ '-' | '-' '
`------' `----' `---' `---'`--'`----'--' '--`--' `--`--| |-'
 `--'

Installing Android Build Tools. Please, read and accept the license agreement.
build Installing Build Tools
(node:77252) [DEP0190] DeprecationWarning: Passing args to a child process with shell option true can lead to security vulnerabilities, as the arguments are not escaped, only concatenated.
(Use `node --trace-deprecation ...` to show where the warning was created)
License android-sdk-license: ] 10% Computing updates...
```
2. Accept the license and terms by pressing Y.
3. Enter your Key Store password:
```shell
Please, enter passwords for the keystore /Users/sebastian/~/flow-crm-tutorial/android.keystore and alias android.

? Password for the Key Store: ********
? Password for the Key: ********

Building the Android App...
 - Generated Android APK at ./app-release-signed.apk
 - Generated Android App Bundle at ./app-release-bundle.aab
```
Build Output
This process outputs two files:
app-release-signed.apk— a signed Android application that can be installed and tested directly on a development device or emulator.app-release-bundle.aab— the Android App Bundle format required by Google Play for publishing.
TIP: Use bubblewrap install with a development device or Android emulator connected to test your app locally before submitting it to the Play Store.
Verifying Domain Ownership with assetlinks.json
To let Android trust that your TWA is authorized to represent your PWA's domain, you need to host a assetlinks.json file at https://yourdomain.com/.well-known/assetlinks.json. This file establishes the Digital Asset Links between your website and your Android app, and must contain:
package_name— the Application ID you specified duringbubblewrap init(e.g.,localhost_8080.twa).sha256_cert_fingerprints— the SHA-256 fingerprint of the signing key used to sign your app, taken from the keystore you created during setup.relation— set to ["delegate_permission/common.handle_all_urls"], granting the app permission to handle URLs from your domain.
You can retrieve the fingerprint from your keystore with:
```shell
keytool -list -v -keystore android.keystore -alias android
```
Without a correctly hosted assetlinks.json, Android will show the TWA's URL bar instead of running it in fullscreen mode, since the domain-app relationship can't be verified.
Submit to Play Store
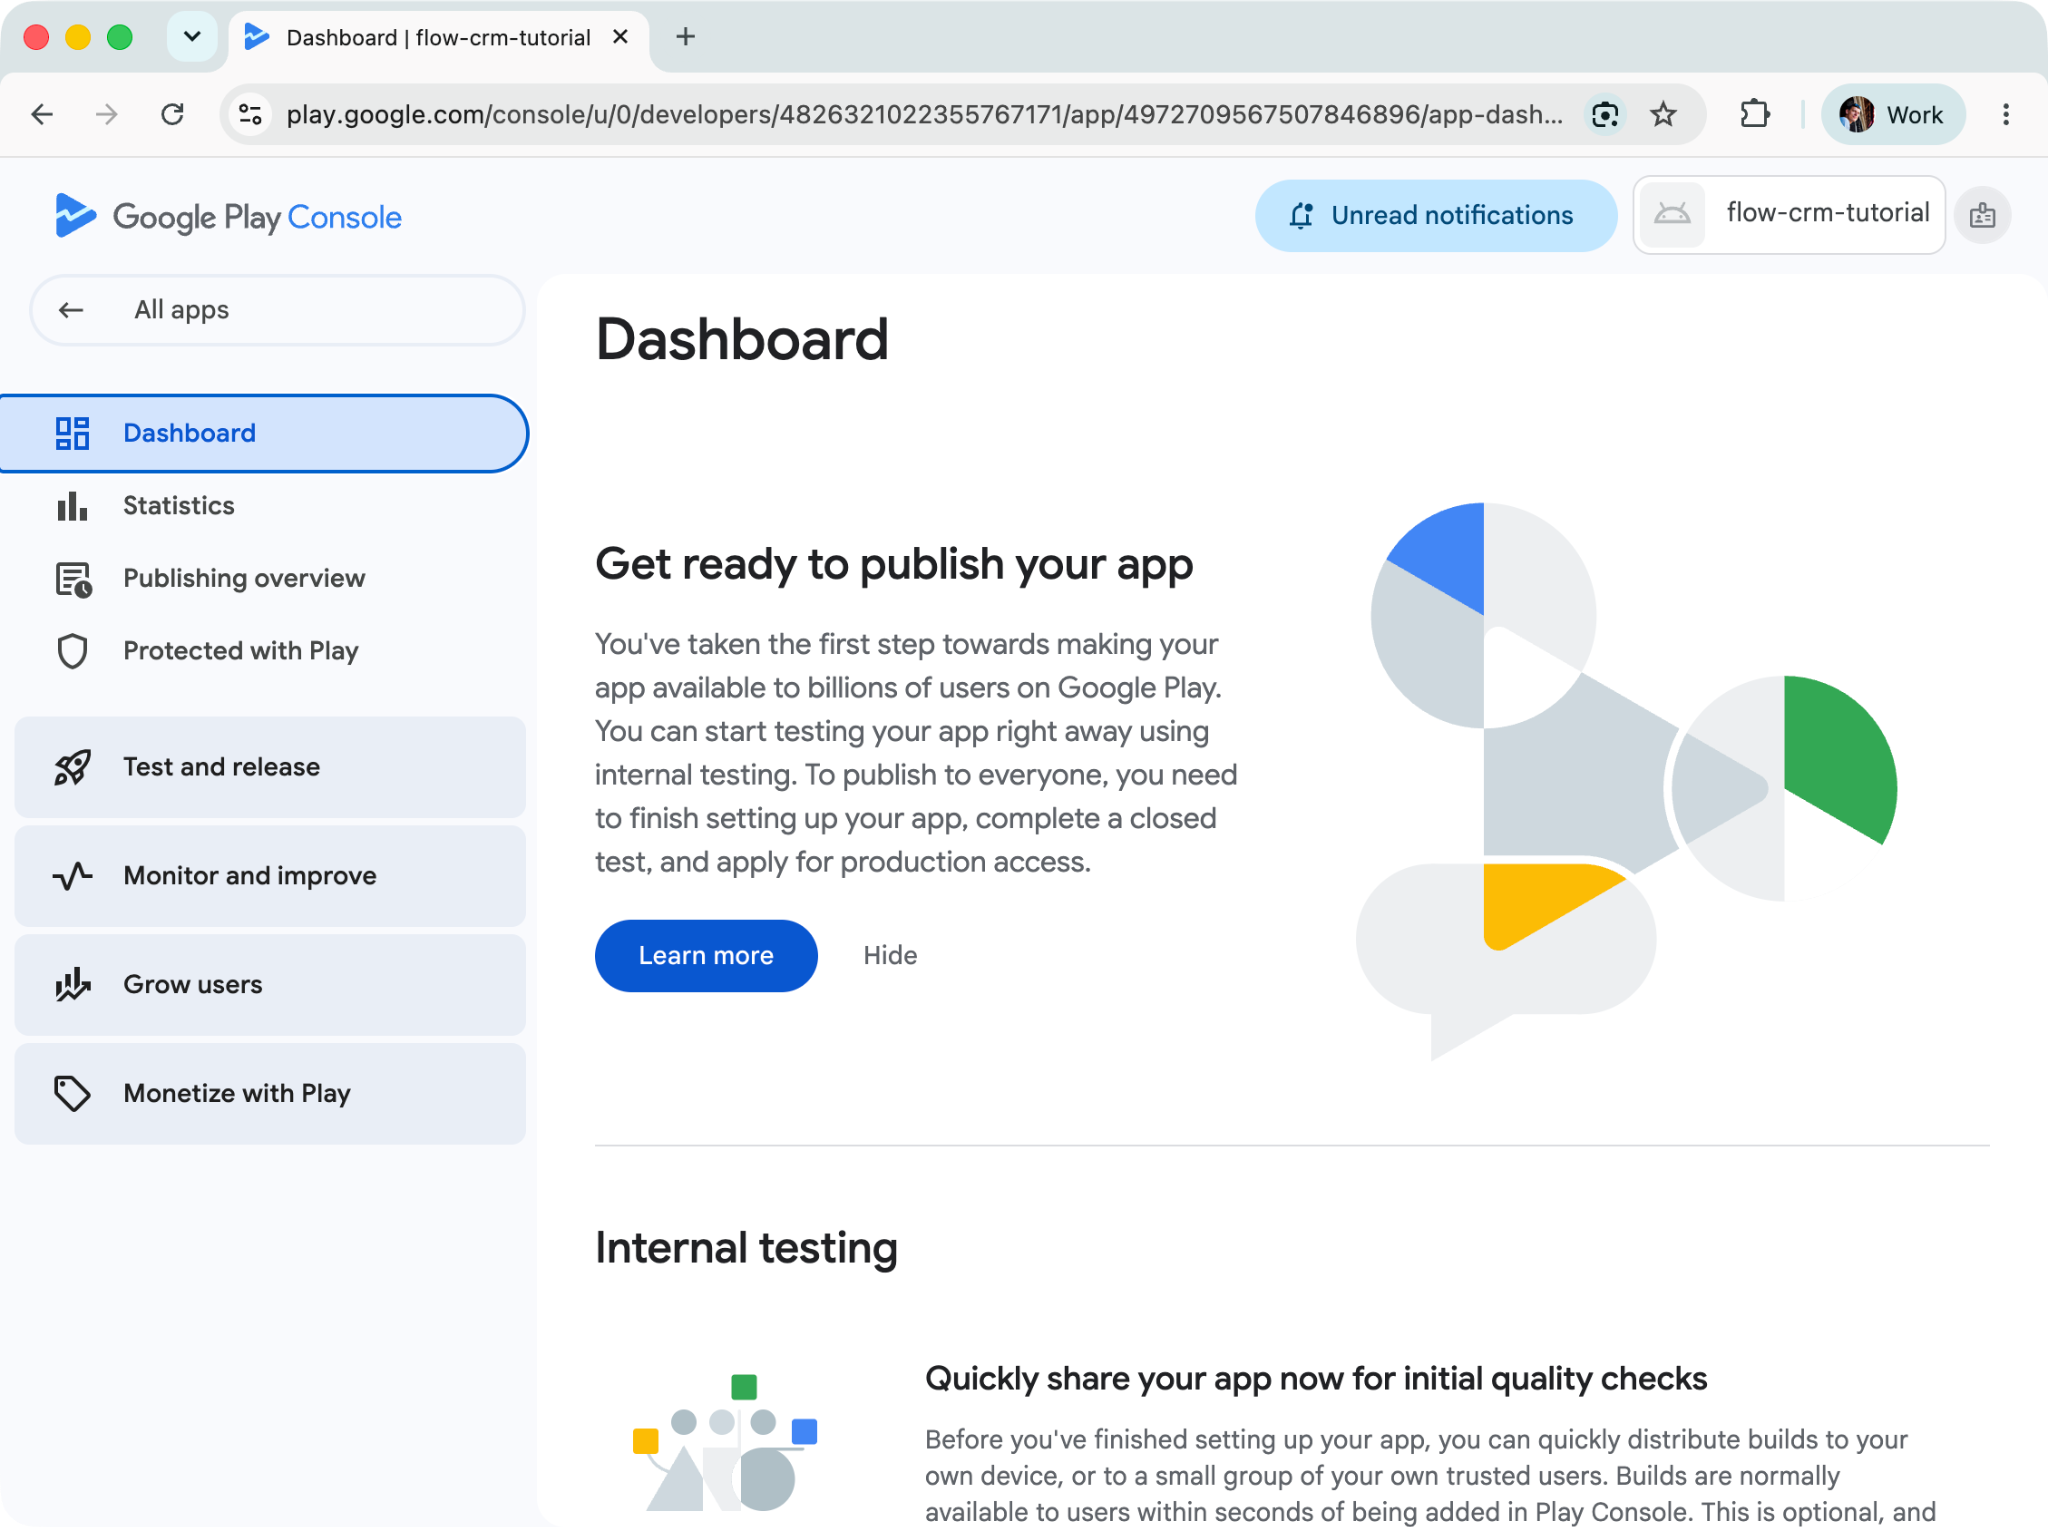
You can now sign in to the Google Play Console to submit your packaged PWA. You can find detailed instructions on how to upload and test your application in the Google Play Console - Dashboard.
Source code on GitHub.
Happy coding!